How to Create new Ticket
- Agent Portal
- Log in to the agent portal.
- Click on “New Ticket” icon on the Menu bar on the top next to the “Search” icon.
- The new ticket form will be displayed.

- Fill out the form then click “Create.”
2. Customer Portal
- On the Freshdesk agent portal home screen, click on the profile and select “Go to Customer Portal”

- Click “Submit a Ticket”

- Fill out the form and click “Submit”
Note: Ensure that the Contact and Requester tabs reflect the customer's name and email, rather than those of the agents.
How to Create new Email
- Log in to the agent portal.
- Click on “New Email” icon on the Menu bar on the top next to the “Search” icon.
- The new email form will be displayed.

Fill out the form then click “Send.”
Note: When you forward an email from your personal email to labels@wbf.com, a ticket is automatically generated, indicating it's from a customer.
Important Notes:
- All customer correspondence is directed to Freshdesk.
- If you receive a phone call from a customer, create a ticket using the "New Ticket" feature in Freshdesk, adding the customer's email to the contact details and copying the email content into the description box.
- For emails received from the customer on your personal email, forward them to labels@wbf.com to generate ticket in Freshdesk.
Ticket Handling
- Sign in to the agent portal.
- Navigate to the ticket icon in the left panel from the dashboard.

3. Choose and open a ticket.

4. Respond or take necessary actions on the ticket.
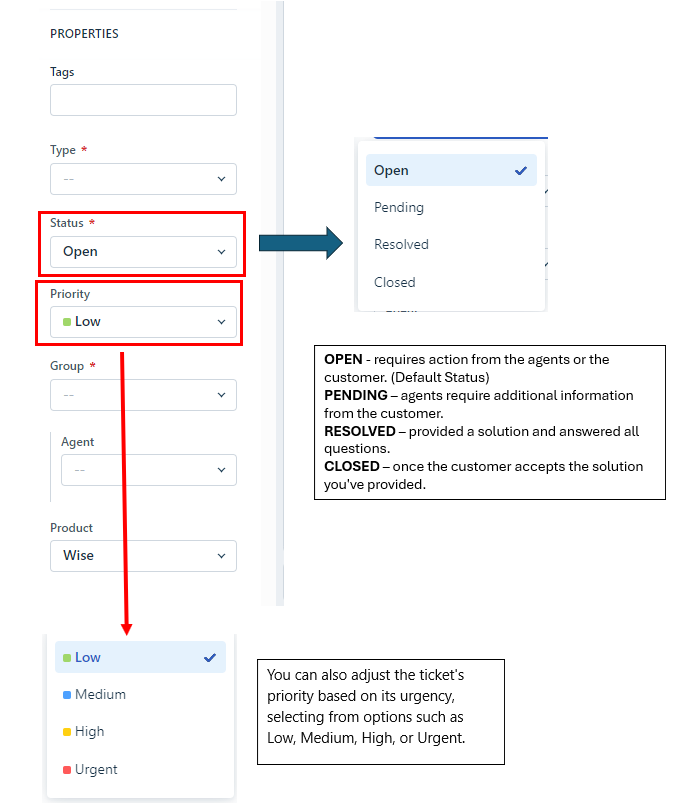
5. Ensure to update the ticket’s Type, Status, Group, and Agent as necessary.

Note: Refer to the Ticket Types and Definitions file in the Knowledge Base for guidance on assigning tickets, including choosing the appropriate ticket type, when and to whom they should be assigned.

6. When finished, click "Update" to save the changes.

Was this article helpful?
That’s Great!
Thank you for your feedback
Sorry! We couldn't be helpful
Thank you for your feedback
Feedback sent
We appreciate your effort and will try to fix the article